There are clothing recolor kits, so you can get the look you want for your clothing! I went ahead and crafted some more and added to Mos Eisley bazaar for pretty cheap  Welcome back!
 H
H
Hightee
@Hightee
Posts
-
just wanted to say thank you -
Sign up list for Galactic Homeshow -
Idea for new survey toolI personally like that idea, and if it is something that could be added, suggest giving that ability to the interplanetary survey droid. As of now, that one isn't that useful in my opinion, it just gives a list of what's on the planet, and not location or % amounts.

Or like you said, another variant of the seeker droid, but for resources. Either way be a nice QOL addition for sure.
-
Hightee's Guide to TexturesWith the new workflow in the 64bit Client, making new textures is now much easier! First off you will need a few things to get started. You will also need some form of image editing software, like Photoshop or Paint.net for a free version. In these examples I will use Paint.net to show how you can make stuff for free. There is a few tools that Rezec has made that are used as well that I will cover as I get to them.
Step 1: Find an item you wish to recolor
This will require access to either a copy of the .GLB or .PNG file you wish to edit. For this example I will be using this .PNG file of the stormtrooper chestplate.
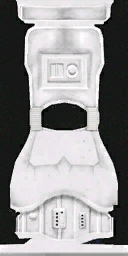
Step 2: Recolor your .PNG in your image editing software of choice.
This part just make sure you keep the overall design the same. Some of these textures will look really weird, and make little sense sometimes, but its how the game reads the texture and "wraps" it around the ingame mesh. So its really important to keep the overall design if you want it to render correctly ingame.
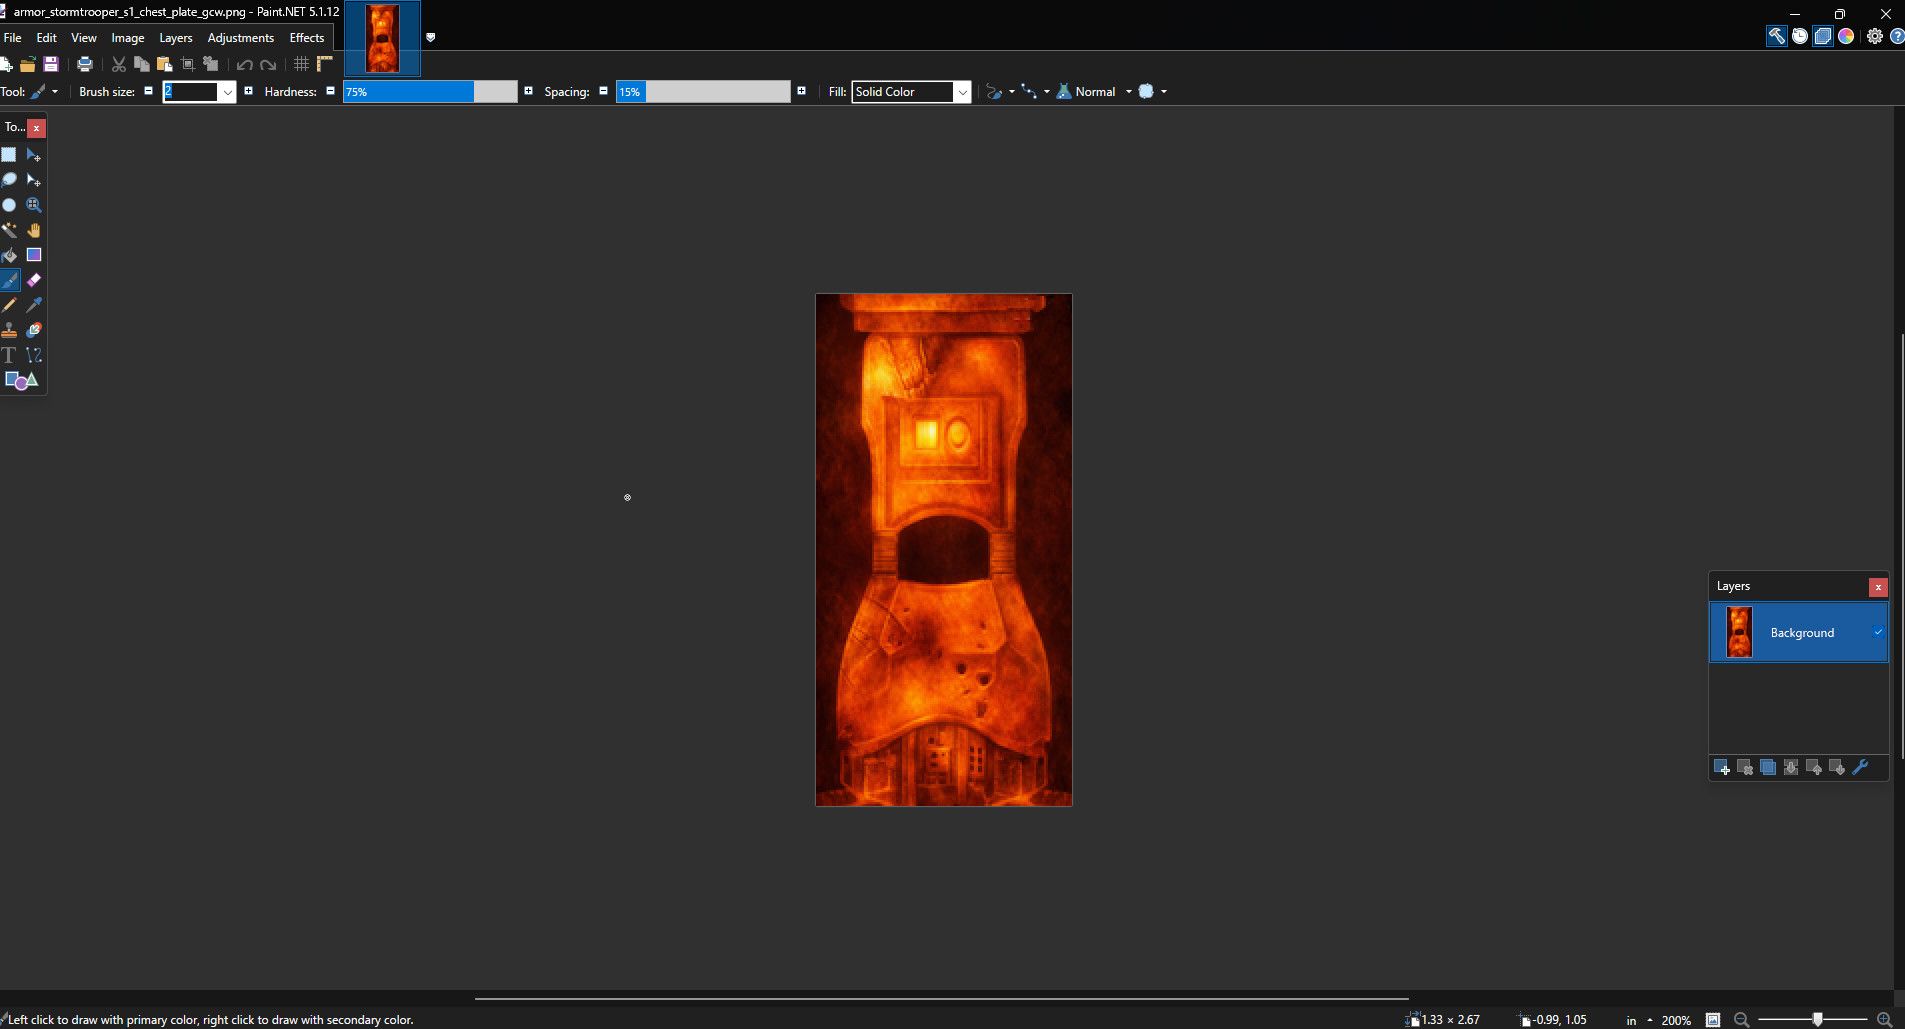
Here is my recolored texture in my editing software. Notice I kept the overall design so it will hopefully match the ingame assets. Once your happy with your result you wanna save it, make sure to keep the resolution in multiples of 4 (256, 512, 1024, etc.).
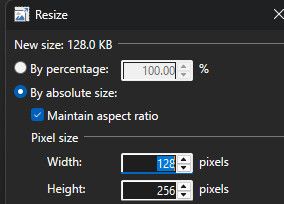
Step 3: Convert the .PNG to a .DDS
Next you are gonna need to convert this file to a .DDS file the game can use. I save all my stuff to my Evolve directory for easy of use, but you can do it however you like, just keep track where you are saying this stuff
 Next you will run a tool Rezec made if you have access to it. You will need to open command prompt and navigate to where you keep your images and tools provided and run this command. Note your install or drive may be different then mine, so change the lines as needed.
If you did everything right so far, the tool should have made a .DDS file from your .PNG and placed it in your texture folder for you. You will probably need to create these folders ahead of time. Mine looks like this.
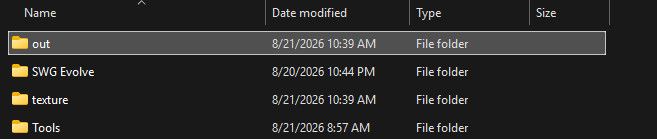
and after I run the tool, my new .DDS file appears ready to be added to the game!
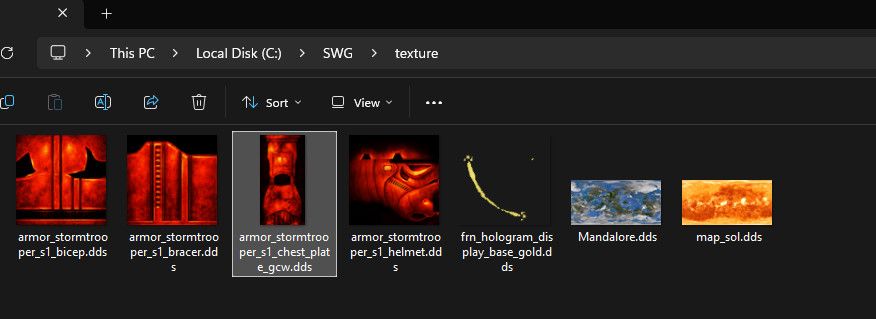
Now the naming of these files is pretty important, and if you are simply recoloring an item, then you leave it the same name as what it was, a new item will require a dev to generate some data on their end.
Step 4: Testing your item ingame.
Next you will need to make a few folders in your game directory and add some info to your custom.cfg.
Add this to your custom.cfg:[ClientObject]
loadGlbMeshes=true
loadGlbSkeletalMeshes=true[SharedObject]
loadGlbPobs=true
preferGlbOverAsset=trueThis will allow the game to read your new textures and meshes you have made. Next add these folders to your game's directory.

And add your new .DDS texture in the texture folder. A new or changed .GLB would go in the other appearance folder.
Next you fire up the game and depending on what you edited, should show up once you are ingame, now this is just on your end. Everyone else will still see stuff as normal. For it to be made for everyone requires a dev to either edit or add the new item or textures to the server. If nothing changes or you dont see your item, then you could have either not added your new texture to the right spot or the file size could be off, or the name was wrong. So make sure to double check your filenames and sizes as you work.
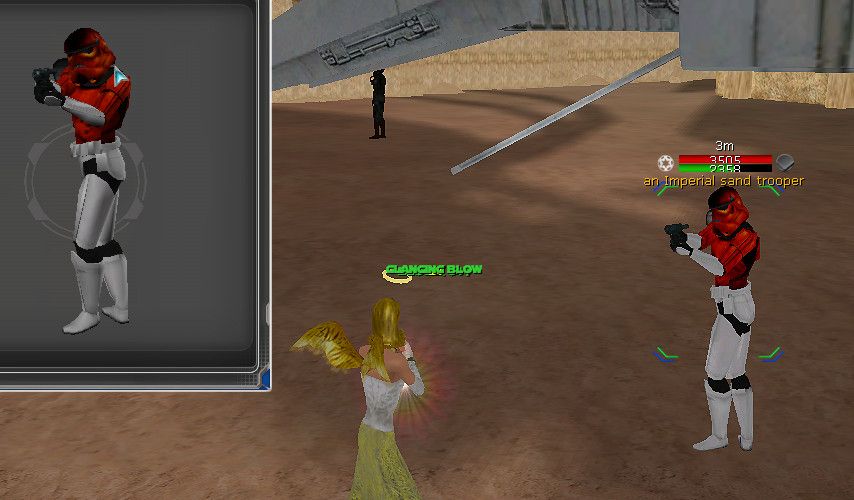
Behold a Pumpkin trooper! WIP
Hopefully this guide atleast gives a general idea how to edit textures. I plan to make a guide on how to edit and make new items soon in Blender, and you will use a similar workflow as this.
-
Hard Mode: Jewelry loot crate review and proposed modificationsI personally like it myself what you proposed here. Seems like a pretty fair and practical way to get the new "hotness" items but not making the content something we just finish in a month or two. Granted I have no idea what the % rates are for loot, but it does feel abit low to me as well. Now Ive only ran like 6-7 of the new Hardmodes so my sample size is too small for sure! Think total I've looted 5 various overload bits and one of the new armor slicing bits, so atleast im getting something
Historical reactions: Like × 1
-
Trash Can -
Active Guilds?Got quite a few active ones, up near the top here under the "Tools" tab shows all the current guilds and leader names
Some like Phoenix are more Rebel aligned but for the most part most guilds I believe are pretty chill on faction. -
Buff Bot 101 :DSo you want a buff bot? Or wanna help your fellow server mates out with your toon buffing people in Eisley while your at work? Well hopefully this guide will give you an idea and tips how to do just that!
Step 1: You need an entertainer, and I would suggest building the ent something similar to the following, mainly for the flag buffs and off the books buff. Your gonna want atleast one point in alot of combat professions for the buffs you can give out once you level your entertainer up in either Rebel or Imperial factions.

Now you can go ranged or melee, but you need to get one or the other then get Smuggler, this is important for the Off the Books buff;
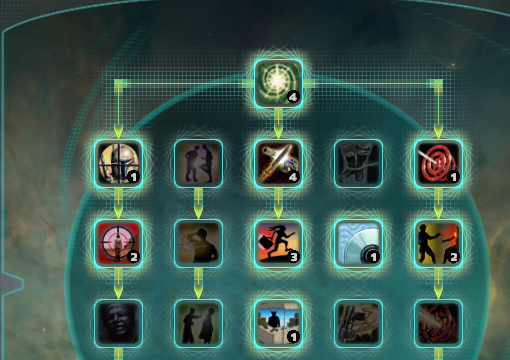
As far as entertainer expertise, this is little more flexible, you can go dancer/musician, I'll post mine for an idea;
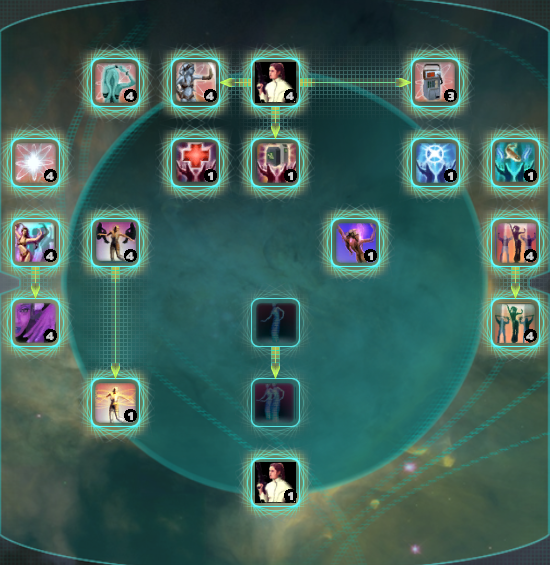
Ok, got your entertainer! and you can give some good buffs! Next you need to get them geared up! The entertainer's jewelry set is the key to next buff, this enables Inspiration buff and just generally good to have for an ent. If you need Tokens, just ask in discord and I'm sure you can get people to come watch and help you get tokens! Might take some time, so be patient
Its worth noting there is some pretty good extras you can get from the entertainer vendor in Eisley, but I would focus the jewelry set at first)Step 2: Macros!
So got your shiny entertainer, but you wanna go afk, or heading to work, but wanna buff people? Well hope this next part gives you an idea. First we gonna need to make a buff, now you can go about this many ways and tweak to your own preferences but here is a good one to start. And you can easily add or delete what you dont need
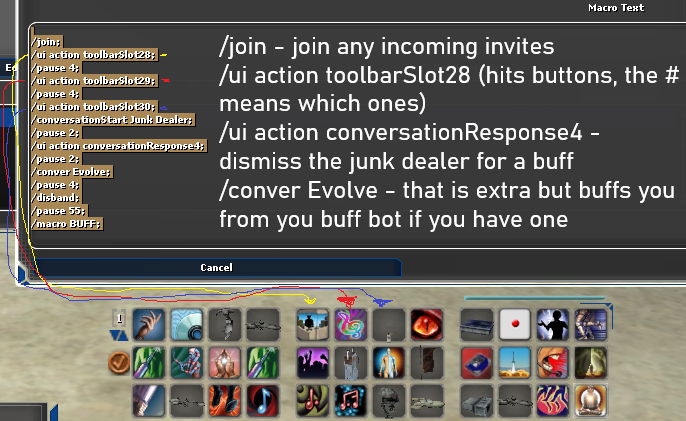
/join;
/ui action toolbarSlot28;
/pause 4;
/ui action toolbarSlot29;
/pause 4;
/ui action toolbarSlot30;
/conversationStart Junk Dealer;
/pause 2;
/ui action conversationResponse4;
/pause 2;
/conver Evolve; (optional, can be deleted if no Evolve buff bot used)
/pause 4;
/disband;
/pause 55;
/macro BUFF; (You can name this whatever, the /macro xx command is so it keeps repeating, xx = name you give the macro)Now this should atleast get you started!
Added some notes to explain some of the commands, the pause commands can be tweaked but I leave mine as such to account for lag or any other issues. The Buff bot can purchased from either the Rebel or Imperial vendors in Mos Eisley for 1k Restuss Commendations, the flag buffs are granted @ General rank in the respective factions, you can get another version at lower rank but the cooldown is pretty long so not really effective for this kinda automated build. For the toolbarSlotXX that is where you place your buffs to be activated, so if you wanna add other buffs, or say officer supply call, change or add accordingly!Hope this helps! Feel free to ask any questions
Attachments
Historical reactions: Like × 2
-
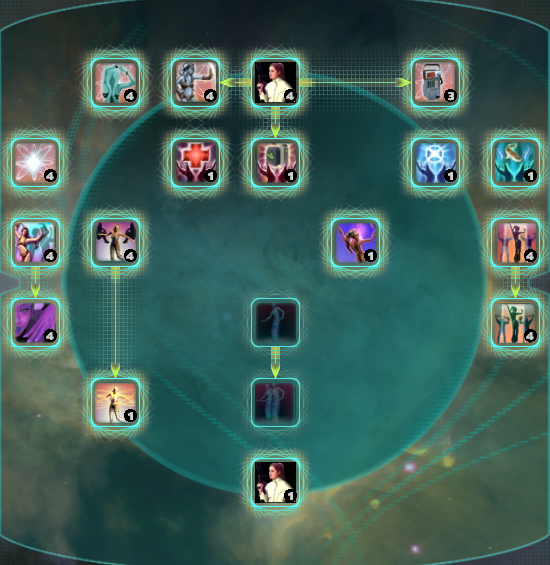
Hightee's Tanky BuildAh yes sorry wearing the Guardian Set, and for my 35's running Str, Luck, Agility. Exotics Crit Hit reduction, Strike-through Chance, wep damage increase for little more damage for this build.
-
Hightee's Tanky BuildFigure post what my build is, open to critique
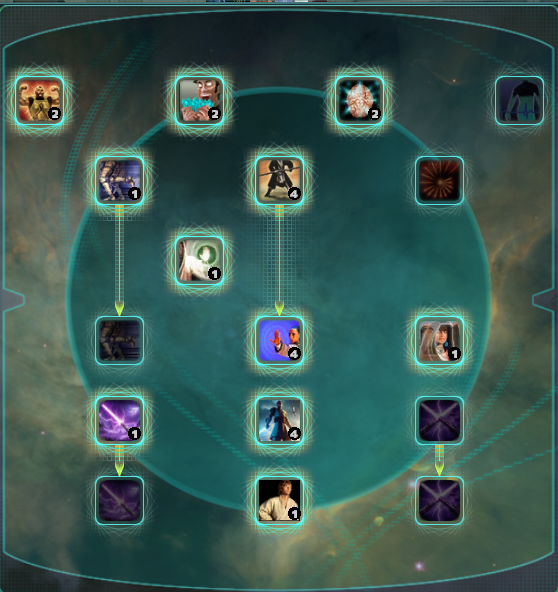
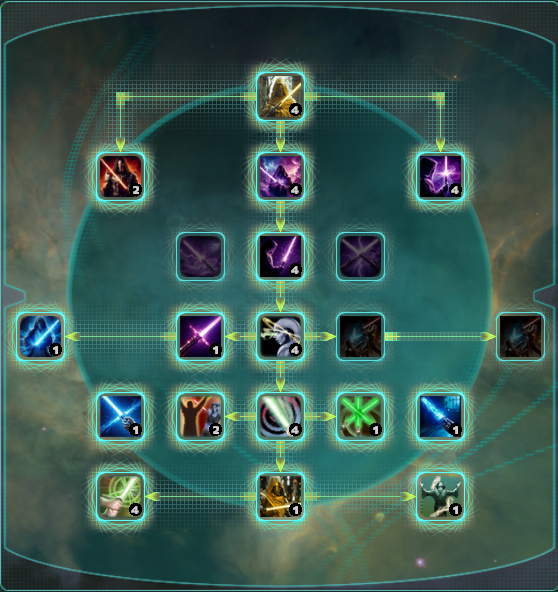
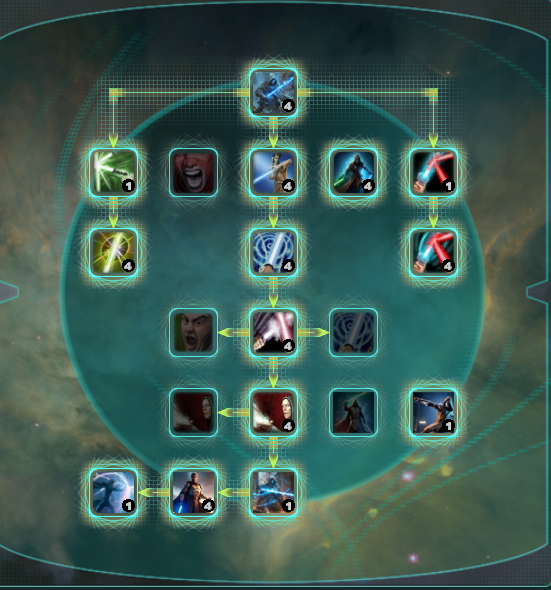
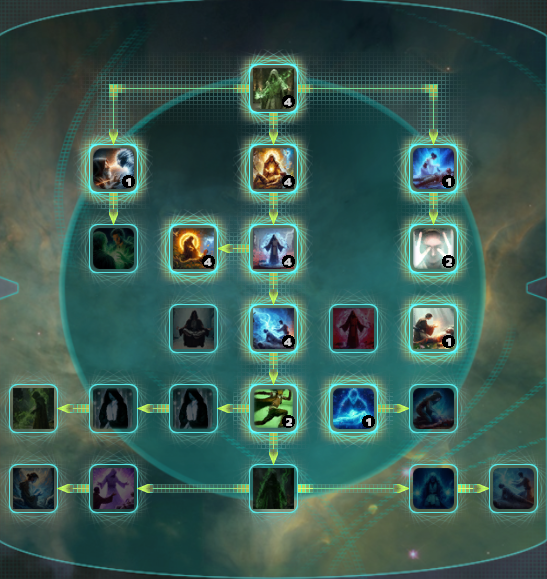
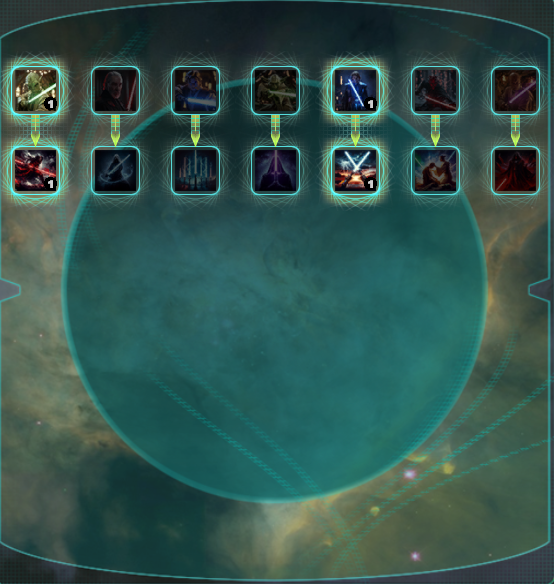
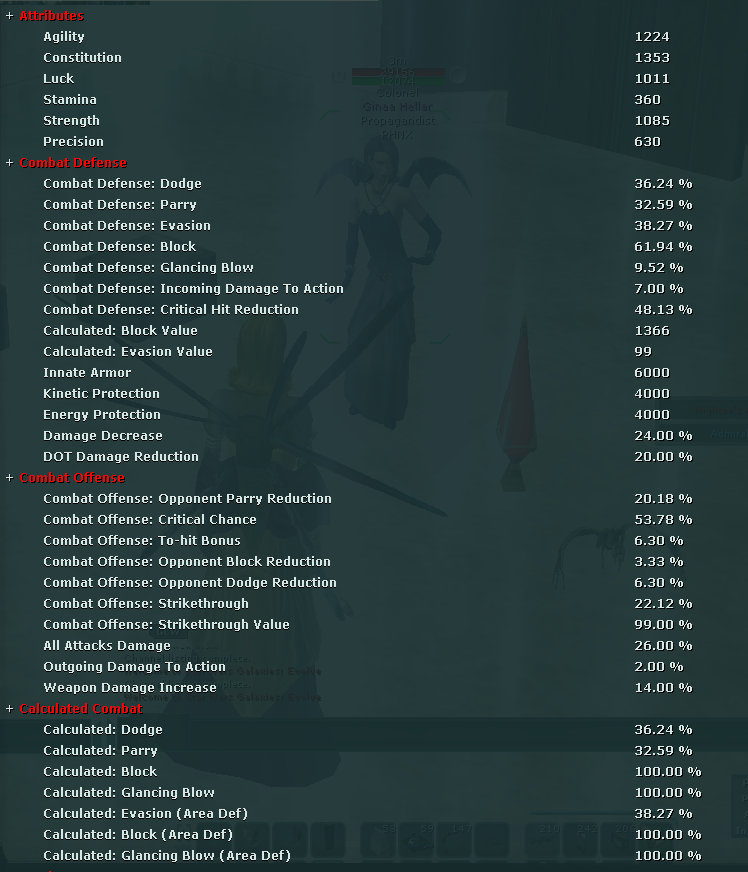
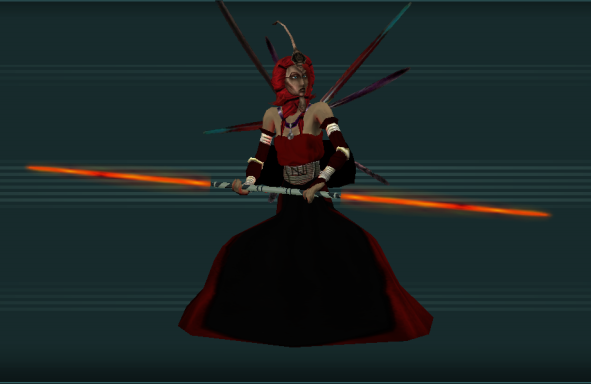
The reason I take Shii-Cho Form is to get access for Disarming Strike, helpful to stun my opponent in pvp and reduce damage from them making the build more tanky. Barrier of Blades for when Saber reflect and block are on cool-down. Now this build well not win any DPS awards for sure but using Weapon PuPs helps or if I know I'm gonna be the Tank, I like to run Block Chance PuPs to push my defense higher. I've been able to tank a few people in PVP doing this, especially useful in group settings or for World Bosses, solo instance runs, etc. With most of the basic buffs, entertainer, flag buffs, Stalwart mediation stance/Shein Form and food. (I use Accarragm and Fizz Pudding) my stats look like this.
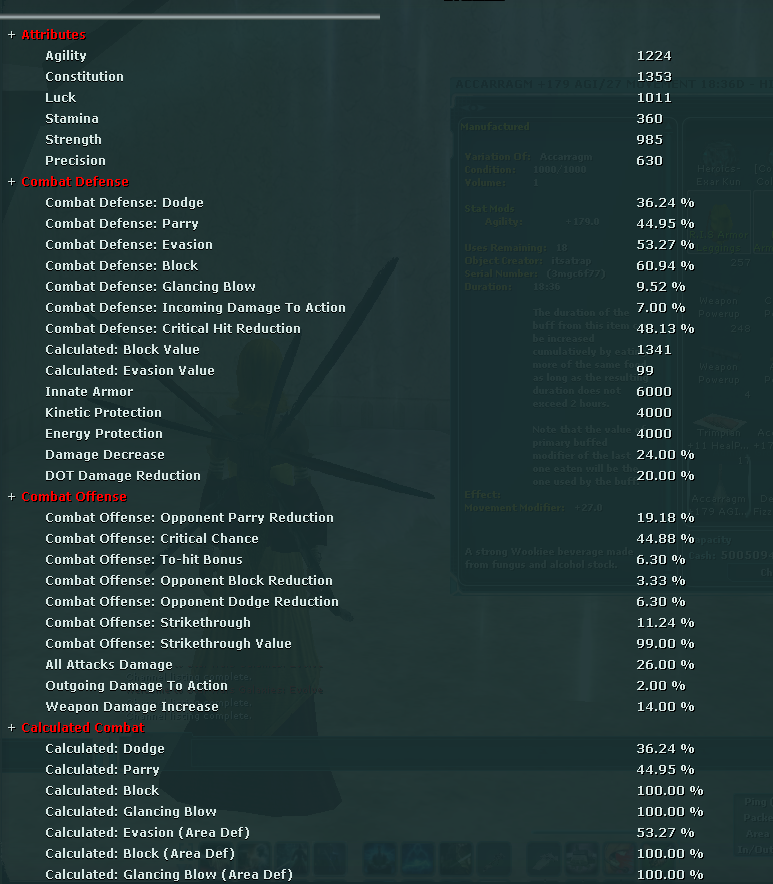
Feel free to ask any questions, never made one of these posts before so tried to include all the relevant information and images
Attachments
-
Jedi RequirementsI'm usually on during Mon-Fri 8-12noon CST (GMT -6) so I think 2pm-6pm in UK? Anyways gladly will help with OG's, can solo/run alts through them all but EK, so if you need let me know and will gladly help
Discord name is same as here.But seems like a good idea