Ayusaru's Tusken King - Tip Guide (Updated 5/25/25)
-
Why a tip guide and not a step by step guide of how to. There is already the SWG WIKI which provides that information, along with other servers that copy and paste the exact same information. You can easily find such information by typing "swg exar kun" in a search engine like Google.
The following video was performed on SWG Evolve server, what you experience on SWG Evolve may be different then what you may experience on a generic new game enhancements (NGE) server. THE VIDEO IS OUTDATED FOR CHAPTER 4.3 (GALACTIC MOON FESTIVAL), It is highly unlikely to be soloed but can be completed using Turret Macro and Bots.
PLEASE VIEW END OF GUIDE FOR RUNNING WITH ALTS.
Ayusaru's Macro Guide
[URL unfurl="thread-839"]https://www.swgevolve.com/index.php?threads/839/[/URL]Character used Yatoya's Rifleman/Assassin Build.
[URL unfurl="true"]https://drive.google.com/file/d/1iJhHnxMmSUCZEoNPUkyR8GdwaUSq2q1x/view?usp=sharing[/URL]
Map of Mos Espa, adjusted for a few comments.
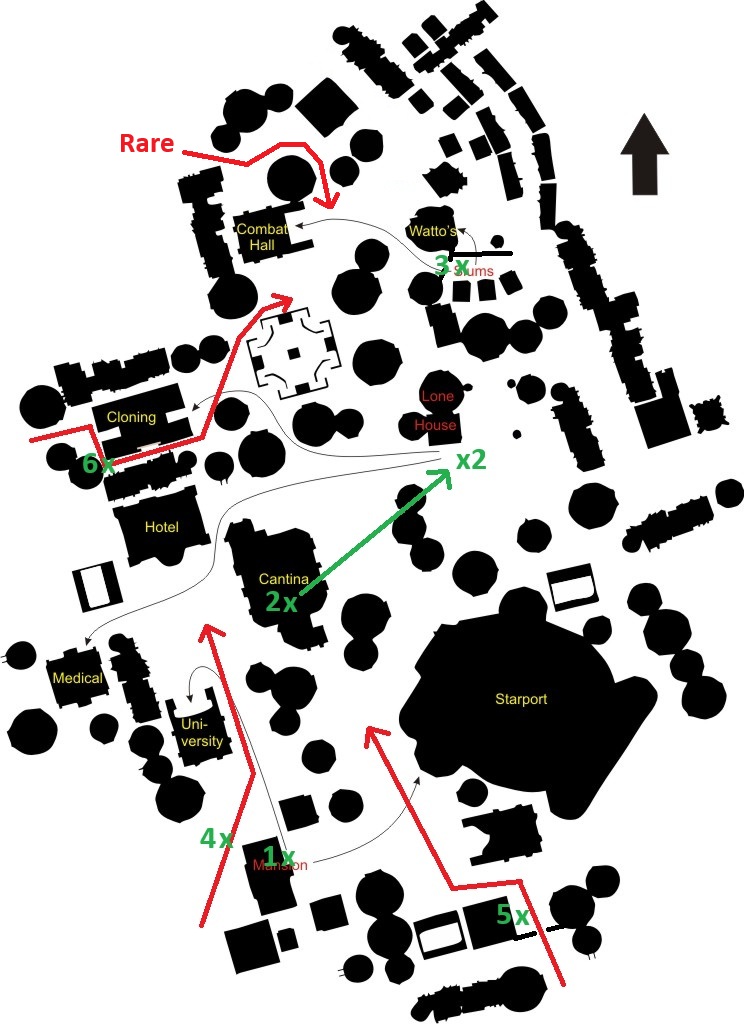
Few comments...
Small Black Lines with Arrows indicate shortest route for experts to be sent.
Red Lines with Arrows indicate Tusken Caravans which include a Tusken Warlord and a few other Tusken.
Green X and Lines with Arrows indicate placement of players or bots to prevent Caravans from reaching Experts and Citizens which need protected.
Red ? with Line and Arrow, this particular line I place because I suspect on rare occasions a Tusken Caravan line will spawn and walk this direction.Tips:
- You will see in the video how I occasionally line up targets so that my cone area attacks can take out multiple targets at a time. This can be especially beneficial when clearing out Tusken Warlord wandering the streets.
Phase 1: Clear the Cantina (Intro-1:35)
The map is a copy of Mos Espa. Your first task is to clear out the Tusken's in the Cantina.Tips: Phase 1
-
Since October 2024 Galactic Moon Festival it is now required to protect Kav and the Citizens. It would be good during this phase to give players duties to protect key locations in Phase 3 or setup bots as turrets to protect key locations. Key locations are where Citizens and Experts come out of and the Hotel, destination of the Citizens.
-
Running with Bots before clearing the Cantina setup Bots for defense around the city. Check out my macro guide for setting up a Turret Macro.
Green 1X Place a Ranged Bot next to the Mansion looking out into the courtyard using a Turret Macro and Combat Macro.
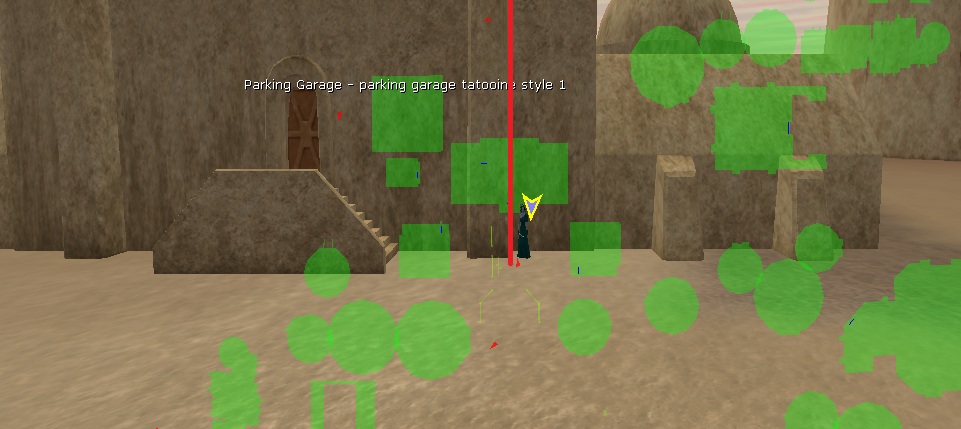
Seen here is a red line, ranged characters when they dodge step to the right, you want this Bot to face the courtyard with the camera and when dodging attacks to bump into this pillar.
Green 2X Place a Ranged Bot to defend the Cantina.
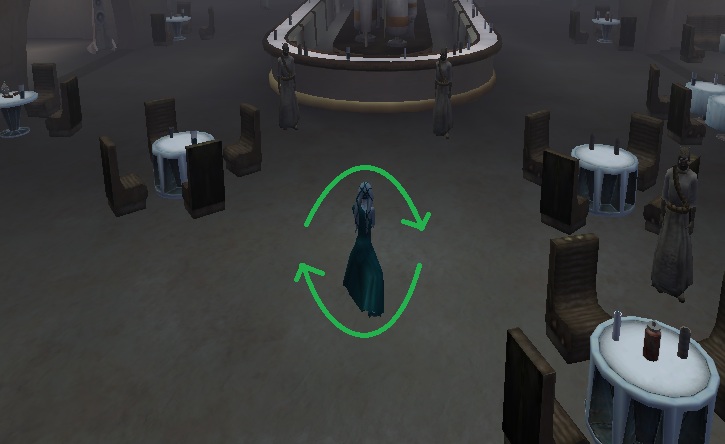
Using a Turret Macro and Combat Macro along with CTRL+SHIFT+S will cause the camera to rotate allowing the Bot to obtain targets in front and behind the Bot.
You may need to check in on this Bot from time to time in order to make sure they didn't dodge there way into a corner.Green 3X Place a Melee or Ranged Bot at the Slums. (I prefer Melee because its close quarters, and they do not step to the right when dodging).
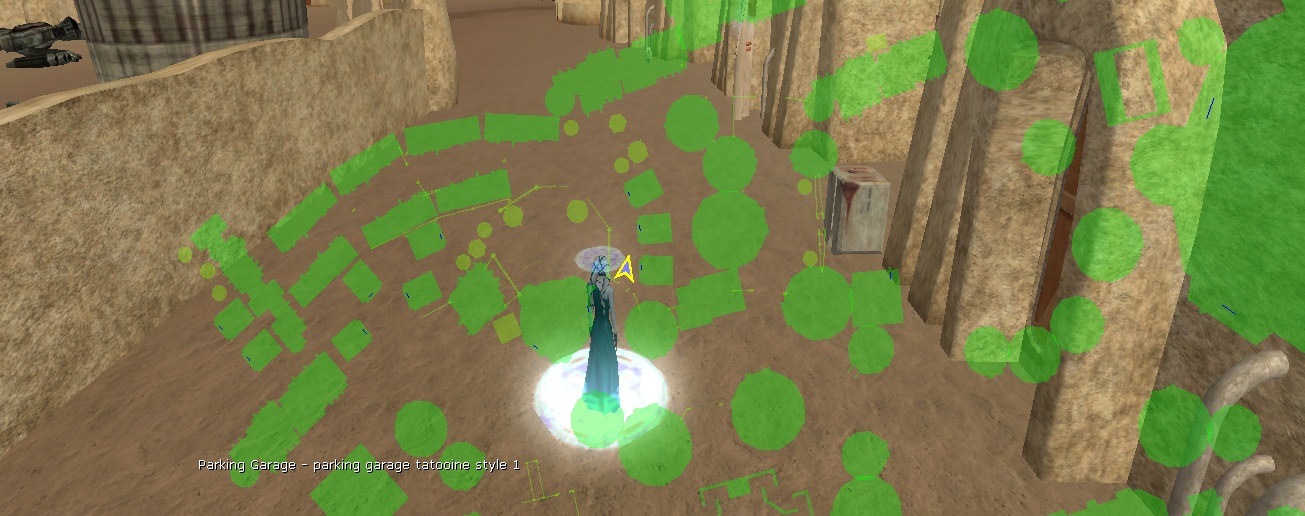
Using a Turret Macro and Combat Macro along with CTRL+SHIFT+S will cause the camera to rotate allowing the Bot to obtain targets in front and behind the Bot. Or face the Bot down the alley to collect targets as seen in the picture.Green 4,5,6X are bonus locations to place Bots to defend the city. (Typically I run with only 4 characters).
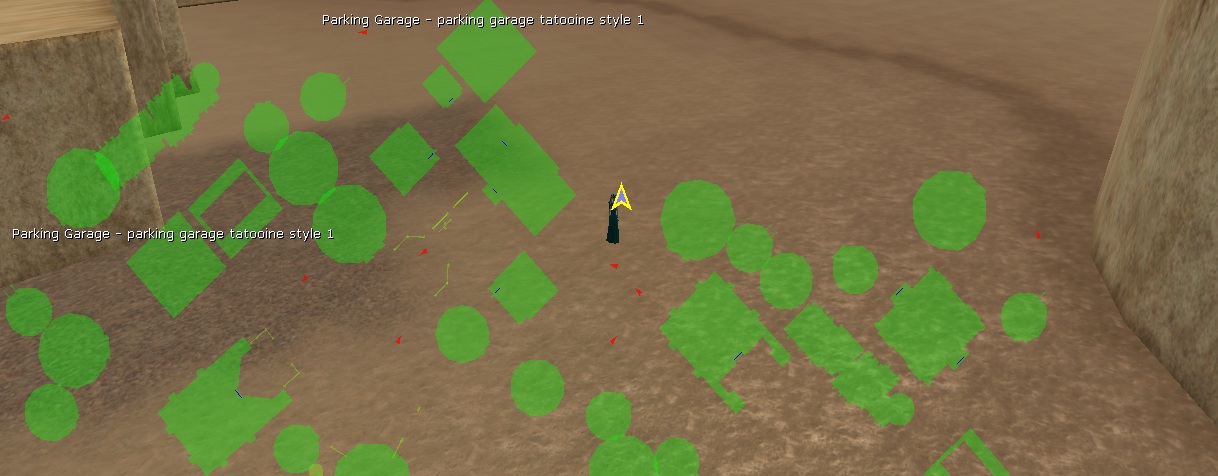
Using a Turret Macro and Combat Macro along with CTRL+SHIFT+S will cause the camera to rotate allowing the Bot to obtain targets in front and behind the Bot.
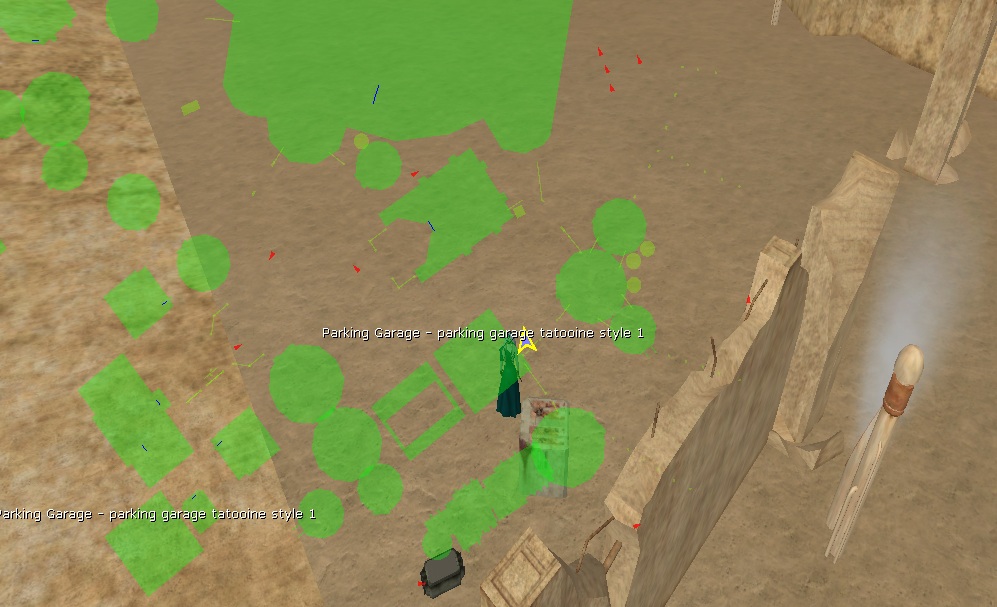
Using a Turret Macro and Combat Macro face outward from this corner so that when the Tusken Caravan passes through you will gain there target.
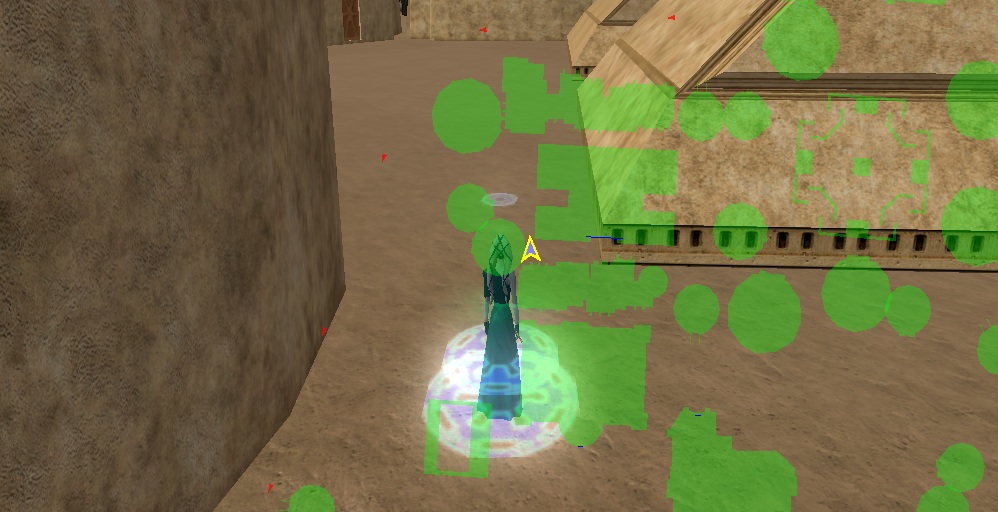
Using a Turret Macro and Combat Macro face down the side of the Cloning Center so when the Tusken Caravan passes through you will gain there target.
(This location is one of the most annoying locations for Tusken Caravan because from corner in the image they will teleport to the adjacent corner from the Cloning Center Entrance, if you find Citizens are dieing there likely dieing from this Tusken Caravan).Phase 2: Clear Out Key Buildings (1:36-11:00)
During this phase you need to clear out the following buildings Hotel, Cloning Center, Medical Center, University, Combat Hall, Watto's Shop, and the Starport. Ordinarily you are required to protect Kav in the cantina. Note in the video I missed a target in the Combat Hall.Tips: Phase 2
- YOU NEED TO PROTECT KAV, so if running with Bots I suggest leaving one in the cantina running what I call a turret macro.
- I like to clear in a clockwise rotation following this order. Starport, University, Medical Center, Hotel, Cloning Center, Combat Hall, Watto's Shop.
- If running with Bots take your strongest character (Good Solo Survival and High Damage) to clear these buildings and streets.
Phase 3: Send the Experts (11:00-26:50)
During this phase you wait for Kav to direct you to one of the following buildings Slums, Lone House, or the Mansion. Experts and Citizens will spawn in these buildings they need to be protected. You need to send the Experts to the previous buildings you cleared out in Phase 2.Tips: Phase 3
-
YOU NEED TO PROTECT THE CITIZENS AND EXPERTS, so if running with Bots I suggest leaving one at the Hotel, Slums near Wattos, Lone House, Mansion, running what I call a Turret Macro.
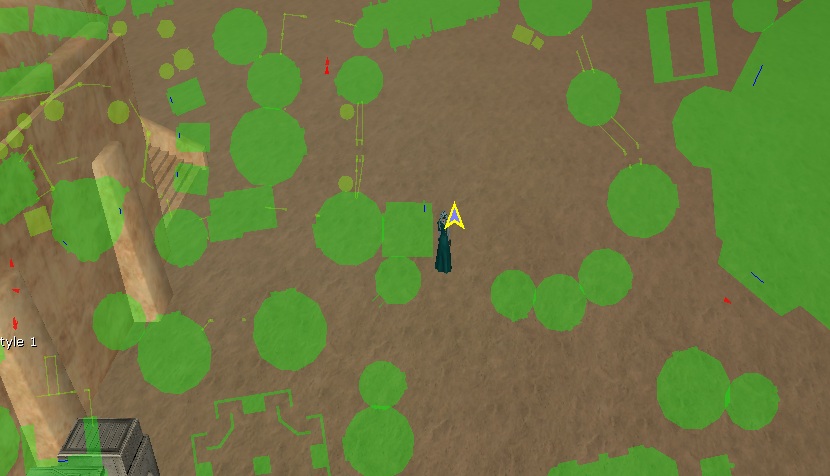
If running with Bots move the Bot that was protecting the Cantina to the Lone House as indicated in the above image. Using a Turret Macro and Combat Macro along with CTRL+SHIFT+S will cause the camera to rotate allowing the Bot to obtain targets in front and behind the Bot. -
Strive to keep the streets clear while waiting for the call to visit one of the key buildings to send experts.
-
I prefer to leave the Starport for last as the experts have a fairly clear line of direction to reach the Starport.
-
If sending Experts from the Slums send them first to Watto's, Combat Hall, Cloning Center... (Small Black Lines with Arrows).
-
If sending Experts from the Lone House send them first to Cloning Center, Combat Hall, Watto's... (Small Black Lines with Arrows).
-
If sending Experts from the Mansion send them first to the University, Medical Center, Cloning Center... (Small Black Lines with Arrows).
Phase 4: Tusken King (27:45-End)
During the first part of this phase Tusken Warlords run in between the Starport and Cantina near the center of town, clear them. During the second part of this phase Tusken Honor Guard and the Tusken King run in. The Tusken King and Tusken Honor Guard share damage.Tips: Phase 4
- Clear out the Tusken Honor Guard first so more damage can be focused on the Tusken King.
- If running Bots send your Lead character to the location between the Starport and Cantina run a Turret Macro and Combat Macro along with CTRL+SHIFT+S while you bring your other Bots to the location to assist the Lead character.
Hello! It looks like you're interested in this conversation, but you don't have an account yet.
Getting fed up of having to scroll through the same posts each visit? When you register for an account, you'll always come back to exactly where you were before, and choose to be notified of new replies (either via email, or push notification). You'll also be able to save bookmarks and upvote posts to show your appreciation to other community members.
With your input, this post could be even better 💗
Register Login