Ayusaru's Armor Crafting Guide Part 2
-
Next window in the crafting process is Experimentation.
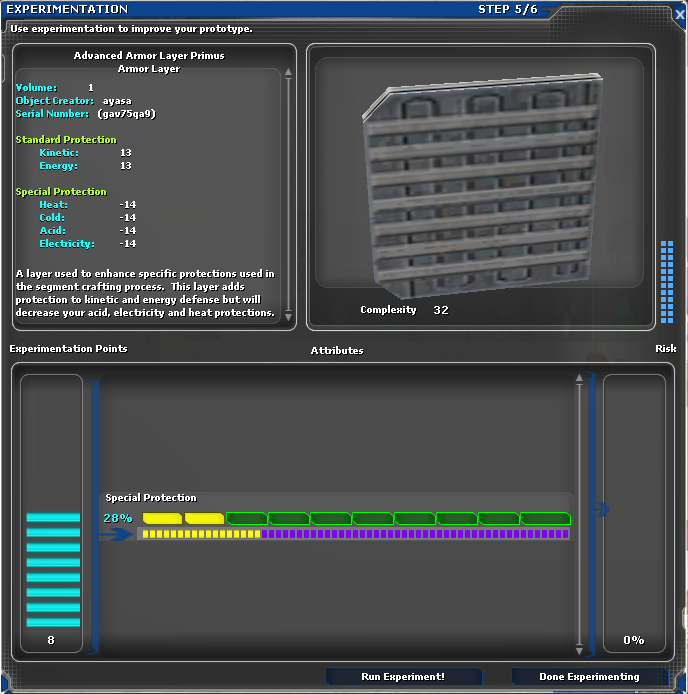
Left notice the number of Experimentation Points, this is effected by our characters Armor Experimentation stat.
Center is where we place those experimentation points.I typically place ALL points on Special Protection, For the first attempt.
If you get an Amazing Success you lose only 1 point. (In theory if you received a Critical Success you would lose 0 points).
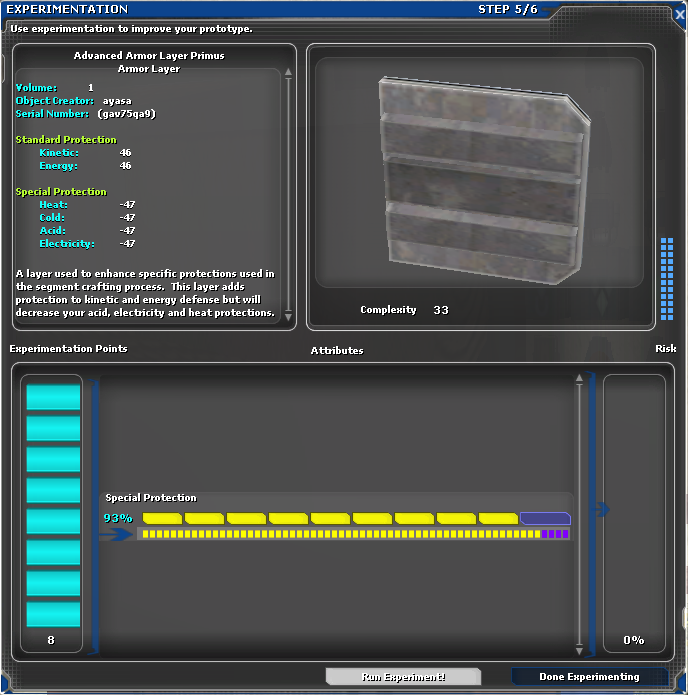
Unlike Weapon Crafting we have plenty of spare Armor Experimentation Points. But to in practice you will want to use Bespin Port again.
Each time you experiment your Bespin Port Drink buff is used up.
Proceed to try attempt with all points on Special Protection.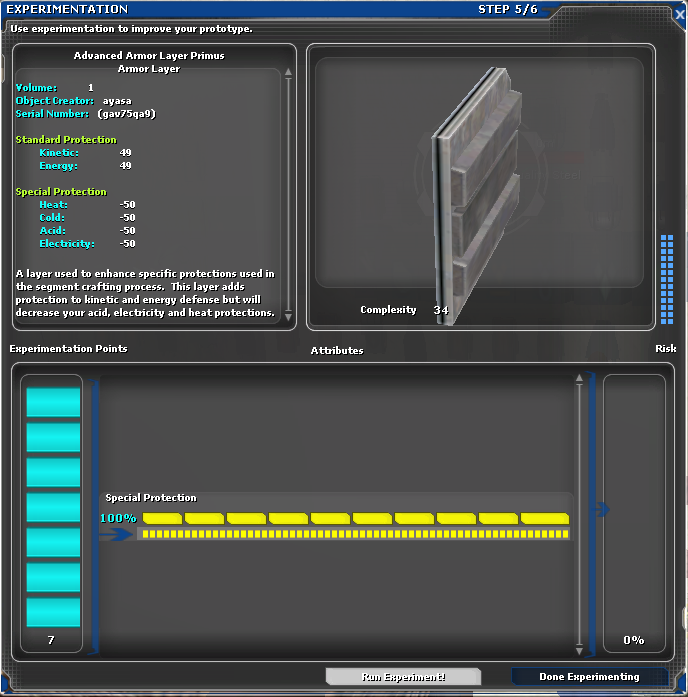
We are now at 100% Special Protection, select Done Experimenting. ConfirmNext we have a choice, Prototype or Schematic.
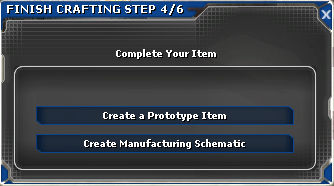
We want Schematic for components. (For Final Armor Piece we want Prototype).
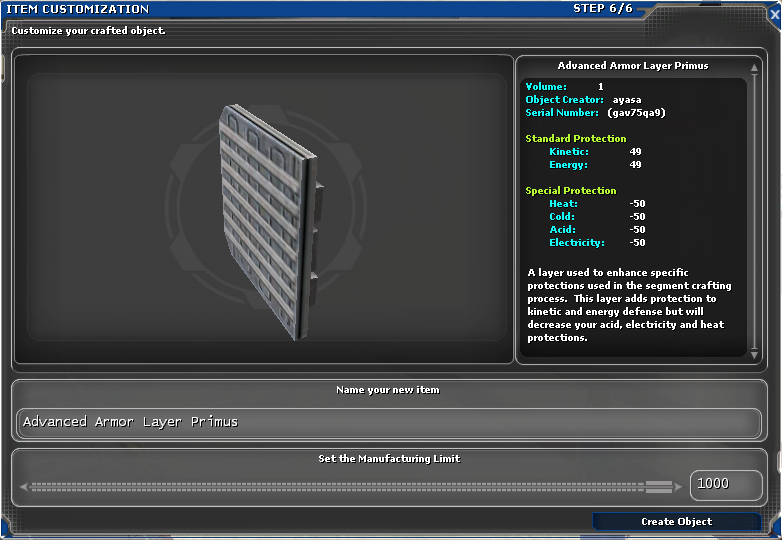
We can make a factory run up to 1000 objects. If this is the best component you can craft, make as many as possible this will save you long term on resources verses crafting each component each time via Prototype, plus single prototype components can only make a few items while factory runs can produce more options.You will need an Wearables Factory to proceed. Run outside to your wearables factory.
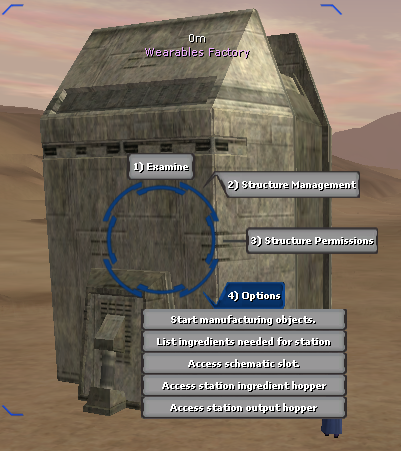
Radial the Equipment Factory with tilde "~".
- Access schematic slot, and place the Advance Armor Primus Layer in.
- Access the station ingredient hopper and place the amount of resources you need complete a factory run of the schematic. 1000 multiplied by (Resource) = ?
- Start manufacturing objects. Return when you need to obtain the component, it may take some time.
(Note you can access the output hopper while the factory is working by selecting Options).
BE SURE THAT YOU HAVE ALL YOUR NECESSARY BUFFS ACTIVE BEFORE PROCEEDING.
Once we have all the layers that we need its time to craft an Armor Segment, Armor Segments come in 3 primary forms.
Assult, Battle, Reconnaissance. Note you will need to match the Segment to the Cores in the step that follows Segments, Cores.
(Assault focuses on Kinetic Protection, Battle focuses on a balance of Kinetic and Energy Protection, Reconnaissance focuses on Energy Protection).Battle Armor Segment
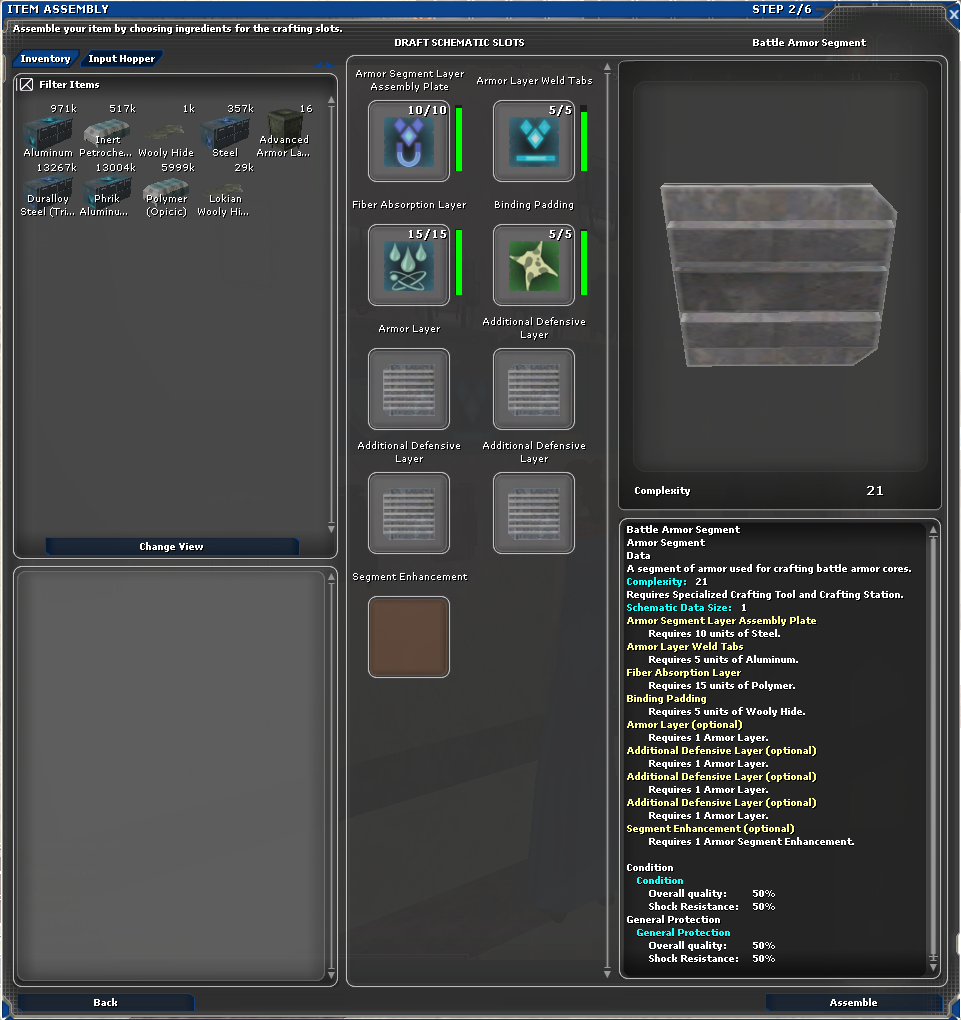
In addition to resources you will notice I have added the following.
4 Advanced Armor Layer Primus.
Segment Enhancement is optional and is now available from Kashyyyk Daily's - Hracca Glade, and Avatar Platform. Krayt Dragon Scales, Rancor Hide, Dragonnet Hide.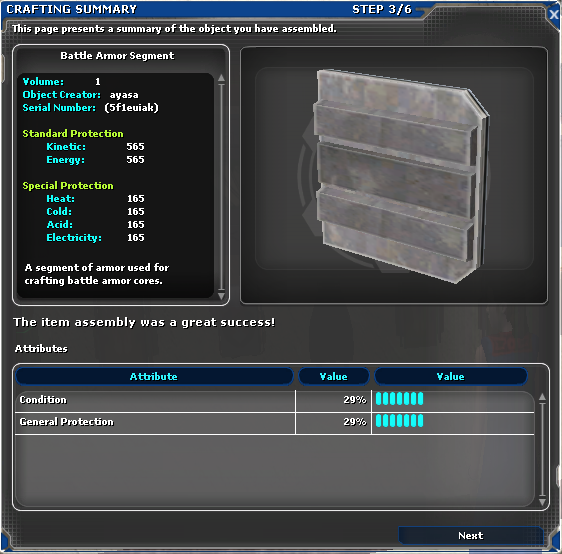
29/30 Max is good. Summary of the defense boost is displayed on the Assembly screen.Once we reach the experimentation stage.
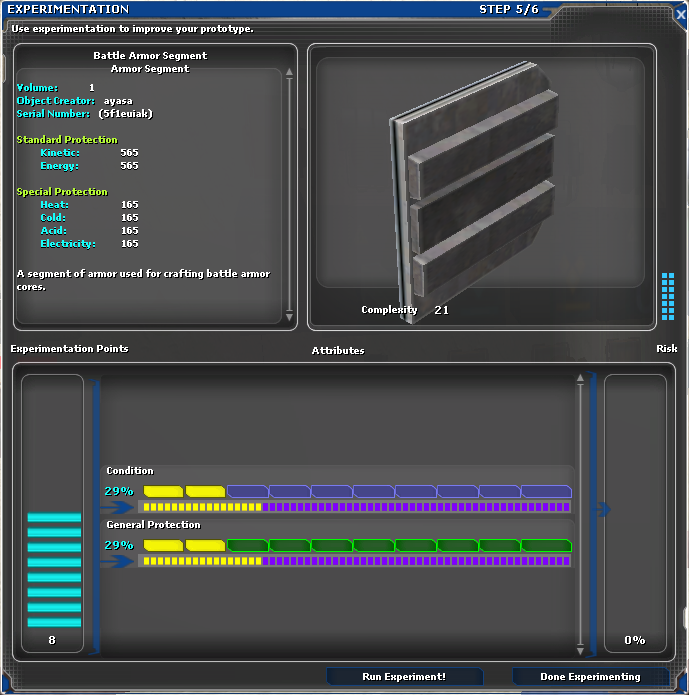
Most important thing we need is General Protection, with NGE mechanics Condition has no value since armor does not decay.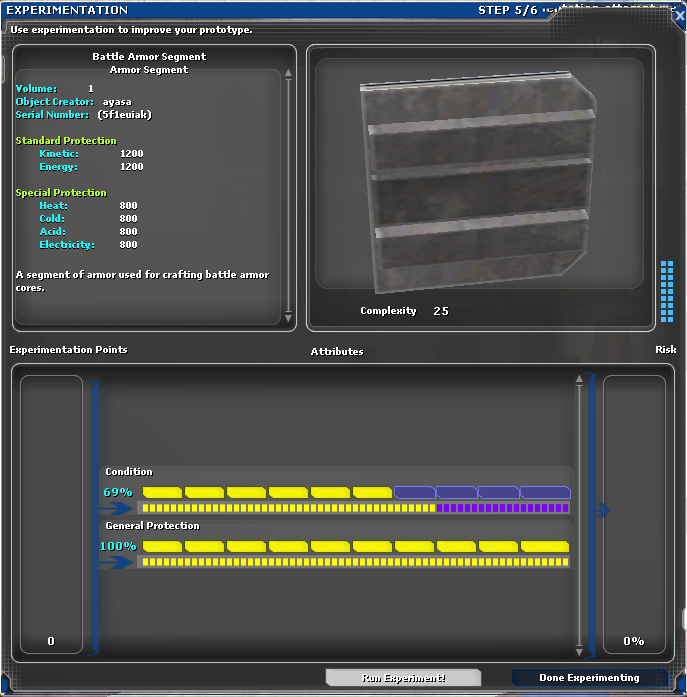
With General Protection Maxed out and using the remain Experimentation on Condition the Armor Segment is complete.
Once more Select Crate Manufacturing Schematic and create a Schematic for a factory run of the Battle Armor Segment.
You may want a second Wearables Factory at this point to run the Armor Segment Schematic alongside the Armor Layer Schematic.Next stage the Advanced Battle Core in Yatoya's Armor Crafting Guide Part 3
[URL unfurl="thread-992"]https://www.swgevolve.com/index.php?threads/992/[/URL]
Hello! It looks like you're interested in this conversation, but you don't have an account yet.
Getting fed up of having to scroll through the same posts each visit? When you register for an account, you'll always come back to exactly where you were before, and choose to be notified of new replies (either via email, or push notification). You'll also be able to save bookmarks and upvote posts to show your appreciation to other community members.
With your input, this post could be even better 💗
Register Login