Posting this as some players ask questions.
Such as does it matter what species I choose?
Should I be Male or Female?
Is there any drawbacks from choosing xx species?
So you downloaded SWG Evolve and are creating a new character, unlike many other popular servers or PreCU (Pre Combat Upgrade) servers we have alot of variety of species.
Example of Creation Window
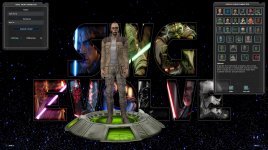
Things to note.
1. Upper Left Corner is the character name, the first name must be unique and non offensive.
2. Clothing, or Starting Outfit, this does not dictate what profession you will become.
3. Species Selection on the right along with Gender Choice.
4. Gender choice the character will be able to wear clothing specific to the Gender Selection, sometimes also restricted to species.
5. Species choice, Wookie and Ithorian are restricted to clothing and armor specific to there species. Trandoshan have restricted footwear. Jenet is the shortest species but also has running speed challenges (Presently restricted 10-7-24). Some species also have visual clipping on helmets (Hear its being addressed 10-7-24).
For the sake of demonstration I will be creating a Female Twi'lek to be a future Entertainer.
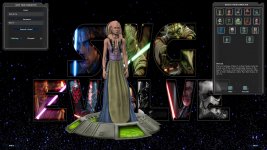
Name: Apiemia Wycie (Auto Generated)
Clothing: Elegant
Species: Twi'lek
Gender: Female
(Note it is possible to obtain a species change device which will allow you to change all this again in the future)
Next you will customize appearance.
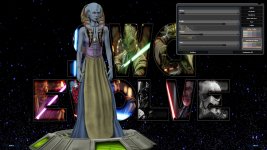
I adjusted some of the cosmetic features.
(Note you can adjust appearance in the future by visiting or becoming an Image Designer)
Next you spawn in Mos Eisley on the planet Tatooine.
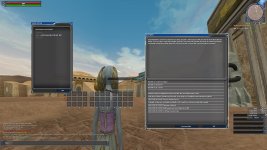
There is windows and boxes making up your GUI (Graphics User Interface) you may want to adjust them for better organization. Please check out this guide.
 www.swgevolve.com
If you have closed your reward window please type /claim in the chat. Take note of some of the rewards available to new characters.
Each character you create can claim the following:
180-day Jump to Lightspeed Veteran Reward: the Sorosuub Luxury Yacht (Spaceship, allows space travel and travel between planets)
Star Wars Galaxies Starter Pack reward: an X-Wing or TIE Fighter instant transport vehicle (ITV or Instant Travel Vehicle, allows fast travel on planet between shuttleports and starports)
AND MORE...
Please claim the 2 rewards mentioned above at this time.
Open your inventory by hitting "I".
Navigate to the Sorosuub Luxury Yacht Deed, Right Mouse Button Click, Generate Ship.
Navigate to the Instant Travel Terminal Deed, Right Mouse Button Click, Grant Ability. Hit semi colon ";", select Travel tab, and drag Call Pickup to your Ability Bar for fast access.
Once your GUI is organized hit "M" to bring up the overhead map.
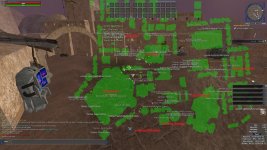
I have highlighted some key buildings and locations in RED.
1. Starport, from here you can travel to other planets, you will want a ship (you should have claimed the Luxury Yacht), or pay for travel.
2. Bazaar, located here is a Bank Terminal which has credit storage and Safety Deposit for personal storage. You also have a Bazaar Terminal which allows you to browse the Galaxies goods that are for sale among players, also located here is a Junk Dealer.
3. Cantina, used on occasion to gather players to group up, entertainers will advertise sometimes that they are providing entertainer buffs which can be viewed on Discord.
4. Cloning Center, note there are 2 of them in Eisley, there is one also close to the Bazaar, when you die you will have the option to clone to a nearby Cloning Center/Facility.
5. Shuttleport, from here you can purchase a ticket to other starports or shuttleports on planet (you should have claimed the ITV), or pay for travel.
6. Parking Garage, if your vehicle is damaged or disabled bring it to one of these to have the option to repair.
7. Quest/Mission, This is the waypoint to your first quest that you received when you first spawned, it will lead you to a vehicle and future quests that can progress your character.
Few additional training points before adventuring.
(Highly recommend viewing the Interface and Settings guide above)
"ALT" locks and unlocks your cursor.
"Y" switches your cursor between manual and auto.
Access your Inventory with "I".
Access your Character Info with "C".
Access your Expertise with "U".
Access your Abilities and Commands with semi colon ";".
Access your Quests/Journal with "J".
Access your Datapad (Waypoints, Vehicles, Pets, Droids) with "K".
Access additional options by bringing up the radial menu using tilde "~".
Example of using tilde:
Accessing the Bank Terminal.
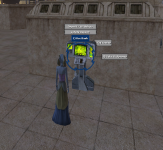
You may also find the radial menu to be beneficial to active trade between players, and watching/listening to entertainers.
How to use the Bazaar Terminal:
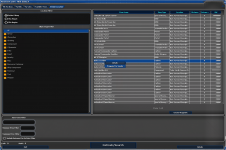
Unless you want to view only local sales you will want to select at the top Vendor Location tab, followed by Entire Galaxy.
Search under a category or use the Item Name Filter to find a specific item by name.
Right Mouse Button click the desired item you wish to purchase, view Details, or select Waypoint to Vendor (or purchase if it is local).
Hit "K" after selecting Waypoint to Vendor.
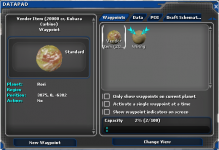
Note the location of the Item, in this case it is located on planet Rori.
You will need to travel to the location to purchase the item.
Very basic combat:
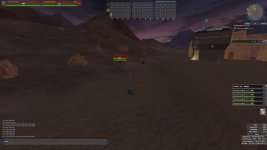
Find a target you want to engage in combat with, while the cursor is set to the Circle with a Dot, not plus symbol / crosshair, get within range and hold down the Left Mouse Button. Alternatively if you followed the Interface and Settings guide you should have auto attack enabled (I typically set it to the Center Mouse Button) while the target is highlighted toggle auto attack and get within range you will auto attack.
Once the target is dead.
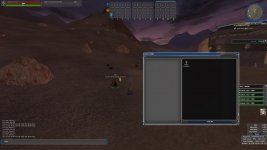
Select the corpse which should loot the corpse, this may not activate if you are still in combat. This may have already happened if you have auto loot enabled, in which check your inventory for the loot. You can also radial menu the corpse using tilde "~" and harvest hide, bone, meat from respective creatures.
One last thing you can automate this process partially by setting up a macro, please check out this guide to making macros.
 www.swgevolve.com
Such as does it matter what species I choose?
Should I be Male or Female?
Is there any drawbacks from choosing xx species?
So you downloaded SWG Evolve and are creating a new character, unlike many other popular servers or PreCU (Pre Combat Upgrade) servers we have alot of variety of species.
Example of Creation Window

Things to note.
1. Upper Left Corner is the character name, the first name must be unique and non offensive.
2. Clothing, or Starting Outfit, this does not dictate what profession you will become.
3. Species Selection on the right along with Gender Choice.
4. Gender choice the character will be able to wear clothing specific to the Gender Selection, sometimes also restricted to species.
5. Species choice, Wookie and Ithorian are restricted to clothing and armor specific to there species. Trandoshan have restricted footwear. Jenet is the shortest species but also has running speed challenges (Presently restricted 10-7-24). Some species also have visual clipping on helmets (Hear its being addressed 10-7-24).
For the sake of demonstration I will be creating a Female Twi'lek to be a future Entertainer.

Name: Apiemia Wycie (Auto Generated)
Clothing: Elegant
Species: Twi'lek
Gender: Female
(Note it is possible to obtain a species change device which will allow you to change all this again in the future)
Next you will customize appearance.

I adjusted some of the cosmetic features.
(Note you can adjust appearance in the future by visiting or becoming an Image Designer)
Next you spawn in Mos Eisley on the planet Tatooine.

There is windows and boxes making up your GUI (Graphics User Interface) you may want to adjust them for better organization. Please check out this guide.
Ayusaru's Interface and Setting
This guide is just to highlight a few things I prefer to adjust when I first start the game, once many of these are set they remain persistent after each login. Launcher Window Go to Settings in the bottom right. Graphics Tab 1. Adjust your Game Resolution (I prefer 1920x1080 @ 119(120) Hz...
 www.swgevolve.com
If you have closed your reward window please type /claim in the chat. Take note of some of the rewards available to new characters.
Each character you create can claim the following:
180-day Jump to Lightspeed Veteran Reward: the Sorosuub Luxury Yacht (Spaceship, allows space travel and travel between planets)
Star Wars Galaxies Starter Pack reward: an X-Wing or TIE Fighter instant transport vehicle (ITV or Instant Travel Vehicle, allows fast travel on planet between shuttleports and starports)
AND MORE...
Please claim the 2 rewards mentioned above at this time.
Open your inventory by hitting "I".
Navigate to the Sorosuub Luxury Yacht Deed, Right Mouse Button Click, Generate Ship.
Navigate to the Instant Travel Terminal Deed, Right Mouse Button Click, Grant Ability. Hit semi colon ";", select Travel tab, and drag Call Pickup to your Ability Bar for fast access.
Once your GUI is organized hit "M" to bring up the overhead map.

I have highlighted some key buildings and locations in RED.
1. Starport, from here you can travel to other planets, you will want a ship (you should have claimed the Luxury Yacht), or pay for travel.
2. Bazaar, located here is a Bank Terminal which has credit storage and Safety Deposit for personal storage. You also have a Bazaar Terminal which allows you to browse the Galaxies goods that are for sale among players, also located here is a Junk Dealer.
3. Cantina, used on occasion to gather players to group up, entertainers will advertise sometimes that they are providing entertainer buffs which can be viewed on Discord.
4. Cloning Center, note there are 2 of them in Eisley, there is one also close to the Bazaar, when you die you will have the option to clone to a nearby Cloning Center/Facility.
5. Shuttleport, from here you can purchase a ticket to other starports or shuttleports on planet (you should have claimed the ITV), or pay for travel.
6. Parking Garage, if your vehicle is damaged or disabled bring it to one of these to have the option to repair.
7. Quest/Mission, This is the waypoint to your first quest that you received when you first spawned, it will lead you to a vehicle and future quests that can progress your character.
Few additional training points before adventuring.
(Highly recommend viewing the Interface and Settings guide above)
"ALT" locks and unlocks your cursor.
"Y" switches your cursor between manual and auto.
Access your Inventory with "I".
Access your Character Info with "C".
Access your Expertise with "U".
Access your Abilities and Commands with semi colon ";".
Access your Quests/Journal with "J".
Access your Datapad (Waypoints, Vehicles, Pets, Droids) with "K".
Access additional options by bringing up the radial menu using tilde "~".
Example of using tilde:
Accessing the Bank Terminal.

You may also find the radial menu to be beneficial to active trade between players, and watching/listening to entertainers.
How to use the Bazaar Terminal:

Unless you want to view only local sales you will want to select at the top Vendor Location tab, followed by Entire Galaxy.
Search under a category or use the Item Name Filter to find a specific item by name.
Right Mouse Button click the desired item you wish to purchase, view Details, or select Waypoint to Vendor (or purchase if it is local).
Hit "K" after selecting Waypoint to Vendor.

Note the location of the Item, in this case it is located on planet Rori.
You will need to travel to the location to purchase the item.
Very basic combat:

Find a target you want to engage in combat with, while the cursor is set to the Circle with a Dot, not plus symbol / crosshair, get within range and hold down the Left Mouse Button. Alternatively if you followed the Interface and Settings guide you should have auto attack enabled (I typically set it to the Center Mouse Button) while the target is highlighted toggle auto attack and get within range you will auto attack.
Once the target is dead.

Select the corpse which should loot the corpse, this may not activate if you are still in combat. This may have already happened if you have auto loot enabled, in which check your inventory for the loot. You can also radial menu the corpse using tilde "~" and harvest hide, bone, meat from respective creatures.
One last thing you can automate this process partially by setting up a macro, please check out this guide to making macros.
Ayusaru's Macro Guide
This is not an end all guide to making macros, I will cover a basic design for making combat macros, assist macros, miscellaneous macros. First off lets get the 3rd row on the Abilities Bar, Hit "O" which brings up Options window, select Interface, then check Expand Toolbar to a Third Row...
 www.swgevolve.com
Last edited:

